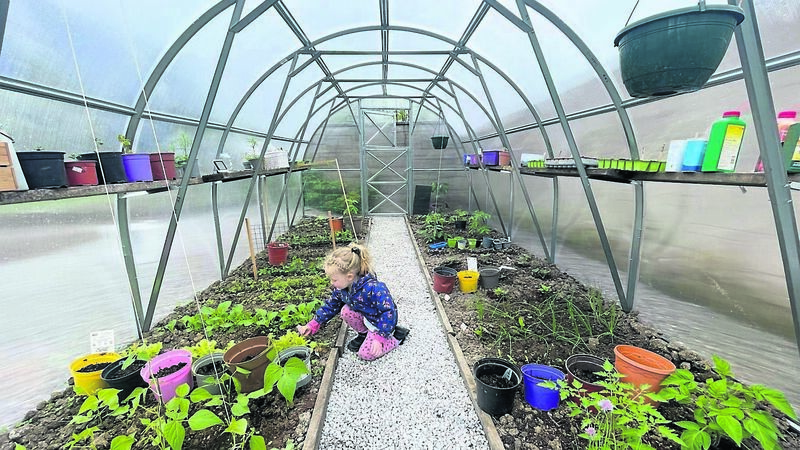
We added a polytunnel to our garden - here's how it's going...

Eimear Hutchinson's Polytunnel.
THIS year, our gardening has taken on a whole new level of excitement with the installation of a polycarbonate greenhouse, or polytunnel, a month ago today.
It feels significant to write about it this week, the learnings and the plans, because today we harvested the first produce sown, from seed, directly into the ground.
I don’t know if there is any real way to capture the sense of satisfaction that comes from growing your own food, seeing those tiny seedlings peeking through and sending the children out to get vegetables for the dinner or lettuce for their sandwiches; it’s a hugely rewarding task.
We opted for a KSB polycarbonate greenhouse from Clonmel Garden Centre. We were initially going to go for a four metre long tunnel but upon further deliberation we ended up with a six metre one, and I’m very glad we did because it is already full!
We also decided to build it ourselves, which, in retrospect, was not our greatest idea. It was a tedious process that involved over 800 small screws, pouring concrete, getting things level, stopping sheets of polycarbonate flying away to the next village... and there wasn’t much room for error. All in all, considering we were only able to do it in the evenings and weekends and a lot of it was weather dependent, it took about five weeks to finally finish it.
That said, it is hugely satisfying to see it now knowing how much work went into it. It is a really sturdy greenhouse so I see us having many years of growing in it.
We have two raised beds on either side around a metre in width that we filled with a top-soil compost mix. There is also shelving along both sides perfect for holding seed trays so I have started all my seeds for the outdoor beds in the polytunnel without taking up valuable ground space. I have also hung some pots with seeds from the roof so there is great space in the small space.
One of my first main learnings was that key to growing vegetables successfully is airflow. I innocently thought the point of a polytunnel was to keep the doors closed, let the heat build up and let the growing commence. However, there was a perpetual build-up of moisture inside that was resulting in my seeds just turning to mush.
As with all queries in the modern day, I turned to the internet and soon realised that in fact you are supposed to keep the doors open for a good portion of the day to encourage the healthiest growing conditions. This quickly cleared out the build-up of moisture and there is still incredible heat in the tunnel, even with the damp months we have experienced this year.
I also have lots of our usual reliables including courgette, tomatoes, green beans, carrots, lettuce and peas.
This year I have pushed the boat out on my tomato plants and have quite a few in the tunnel that I am expecting great things from. My tomatoes did really well outdoors last year but towards the end of the season I found it hard to get them to turn from green to red.
A reasonable amount of work is involved in growing vegetables from planting seeds, watering, weeding, propping, pinching out, potting on or planting out. It is a thoroughly relaxing and rewarding experience and we have just the right amount of space so it’s not overwhelming. I also rope in my little helpers whenever I can so the girls can learn the value, the work and the joy in growing your own food.
For us, the main aim of the polytunnel is to extend our growing season and to give us more space to grow. In previous years, we generally aimed to have the bulk of our veg coming through in mid-July after we returned from holidays, and the outdoor veg was largely finished up by mid-September, even with my succession planting. The outdoor beds are a decent size but we could eat more so a more plentiful supply will suit us perfectly, especially with our four growing girls!


 App?
App?


